Hello,
Today i will show you how to unbrick your Sony Xperia ZR C5502 / C5503 and update boot. Sony Xperia ZR smartphone can be bricked because of damaged boot.
If after flash your phone is dead and you have warranty - send your phone to Sony - you will get new phone.
If after flash your phone is dead and you do not have warranty, this tutorial is for you. Remember, during this process you can damage your phone, everything you are doing on your own risk. For 99% your phone will not be 100% functional, for example it will not be waterproof anymore if you will disassemble or reassemble it improperly.
Bricked phone symptoms:
- can't power on after flash,
- no lcd or led reaction for power button,
- no lcd or led reaction for charger,
- no lcd or led reaction if phone is connected to PC,
- your PC can't detect your phone with vol-,
- phone does not vibrate when holding vol+ and power together.
Repair procedure:
1. Firstly connect turned off bricked phone to your PC. If phone will be detected in device manager as:
qhusb_dload device
you are lucky and this is the end of the first step for you. Just disconnect phone.
If your phone can't be detected at all, you must find testpoint. Disassemble your phone using this service manual: Sony Xperia ZR C5502 / C5503 Service Manuals , remove battery and connect testpoint to GND:
 C5503.jpg 593.81K
37 downloads
2. Download and install the latest Gordon's Gate Flash Driver from this post:  ggsetup-3.0.0.7.exe 3.58MB
14172 downloads
3. Download and run this s1tool:  s1tool 19V2015.exe 3.52MB
2999 downloads
4. Download proper APPSW firmware for your Sony Xperia ZR:
For C5502:  C5502.rar 16.2MB
1048 downloads
For C5503:  C5503.rar 16.2MB
692 downloads
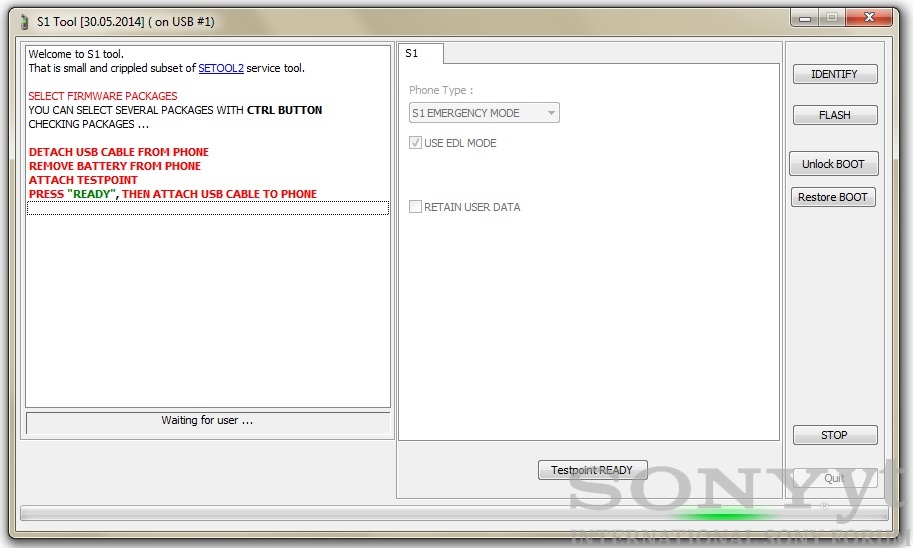
5. In S1tool choose S1 EMERGENCY MODE, press Flash button, select correct APPSW .sin_file_set file (or you can select whole firmware if you have it in order APPSW, FSP, Elabel - but you can't use .ftf flashtool files),
6. Press Testpoint READY button:

and if your phone is detected as qhusb_dload device, just attach usb cable. If not, perform all steps from point 1 (connect testpoint to GND and attach USB cable).
7. When drivers will be installed and phone will be detected, program will ask you to disconnect testpoint. Disconnect testpoint from GND and press Testpoint READY button.
8. After that phone will load emergency s1 loader, re-enumerate usb, load s1 loader, update boot in your phone and flash selected firmware.
9. Now you have to flash (if not done yet) your phone with all firmware parts (APPSW, FSP, ELABEL) using S1 FLASH MODE, phone will be fixed. Also you can flash your phone using Sony Update Service, Sony PC Companion or any other flasher like current Flashtool.
10. Time to reassembly your phone using service manual: Sony Xperia ZR C5502 / C5503 Service Manuals
Credits: Big thanks to mr the_laser for creating this fantastic software and solution ![]()
Best regards,
Jurij
Tutorial worked out for Sony.yt forum - copying is prohibited.


